The better weather is here, and it is now the time for all the avid gardeners to get out and enjoy the beautiful sunshine in the garden, as well as making sure that all of the plants are well cared for and watered.
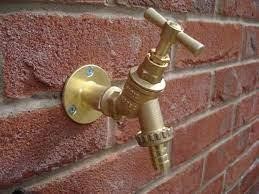
Something that is essential to all keen gardeners is the outside tap – for connecting to the hosepipe and filling the watering can, this makes much shorter and easier work of caring for the garden, especially during those long dry spells that we have in the summer months.

If your outside tap is not as good as it once was, it may now be a good time to replace it, rather than trying to struggle on with it. If you are wanting to replace the tap yourself, here are some things that will help you…
The connection to the outside tap needs to be from a cold-water pipe. This is usually found under the sink and should be from mains pressure cold water. If it comes from your tank, then you might have a detrimental effect on the water pressure in the house when you are using the outdoor tap!
The easiest way to install an outdoor tap is to buy a kit. You may also need additional items such as copper pipe like this watkinspowis.co.uk/products/copper-pipe-fittings-and-press-systems but check what you get in the kit before you begin. You don’t want to get halfway through the job before realising that you don’t have a crucial part!
Before you begin to make changes and start your installation you must remember to turn off the water at the main supply! If you don’t, you could find that you have a flood to deal with. Once everything is fitted correctly and all the fittings are tightened up, you are then safe to turn the main water supply back on.
Prepare in advance the place where your outside tap will go. Make sure you know where all of the pipes are that are running to the spot where it will be and do plenty of investigating and preparation beforehand – you don’t want to end up with holes drilled all over the wall in the wrong places!